Showing posts with label crafts. Show all posts

9.07.2012

School days...

Like many of you, my daughter started school this week.  First grade. 

Clearly, she was excited.

Last year? Not so much.

 It is also her first year riding the bus. 
Even more excitement.

Time seems to being going by at warped speed, but it is pretty amazing to watch her read and learn and to see her confidence start to soar as she does.

I hope all of your kiddos had a fantastic start to their new school year. Here's to one filled with great leaps and bounds and lots of good memories!

Erin

P.S. You may have spied this star burst pencil wreath I made last year in one of the shots above. Last week I linked it up to Hubby Made Me's Throwback Thursday Link Party. Stop by and check out Britni's blog and the other fantastic creations  fellow bloggers have whipped up.

Have a great weekend!


3.22.2012

Trying to keep it simple...

As a follow-up to my last post, I thought I'd share some pictures of Eamon's birthday party.  In the past I would spend way too much time planning, obsessing and crafting the kids' parties.  As I've gotten older/busier/more tired, I find myself paring back a bit, keeping it as simple, yet fun and affordable as I can. This is much easier said than done for me.

Last year (below), Eamon was all about Jake and the Neverland Pirates. This year it was 101 Dalmatians. Since neither of these were on the party store's radar, I had to get creative for both and found more inspiration at the craft store than at Party City.
 I did luck out and find this mammoth Pirate balloon last year.

 a homemade banner made with scrapbook paper and twine

The makings of a pirate party: a treasure chest hunt  to fill the goody bags and a pirate hat making station.The centerpiece was one of Eamon's birthday presents.


This year:
Having a party at home sounds like an affordable alternative to having one out at a kid-friendly place, but it can so easily snowball into an expensive and slippery slope when you start adding up all the little things and food.  This year, I really tried to be conscious of not overdoing it. Here are the kiddos coloring in Patch the dalmatian for their "Pin the tail on the Dalmatian" game. I literally drew the stuffed animal you see hovering in the background onto a sheet of oak tag about an hour before our guests arrived. An artist I am not. Can you say (dripping with sarcasm of course) Mother of the Year?

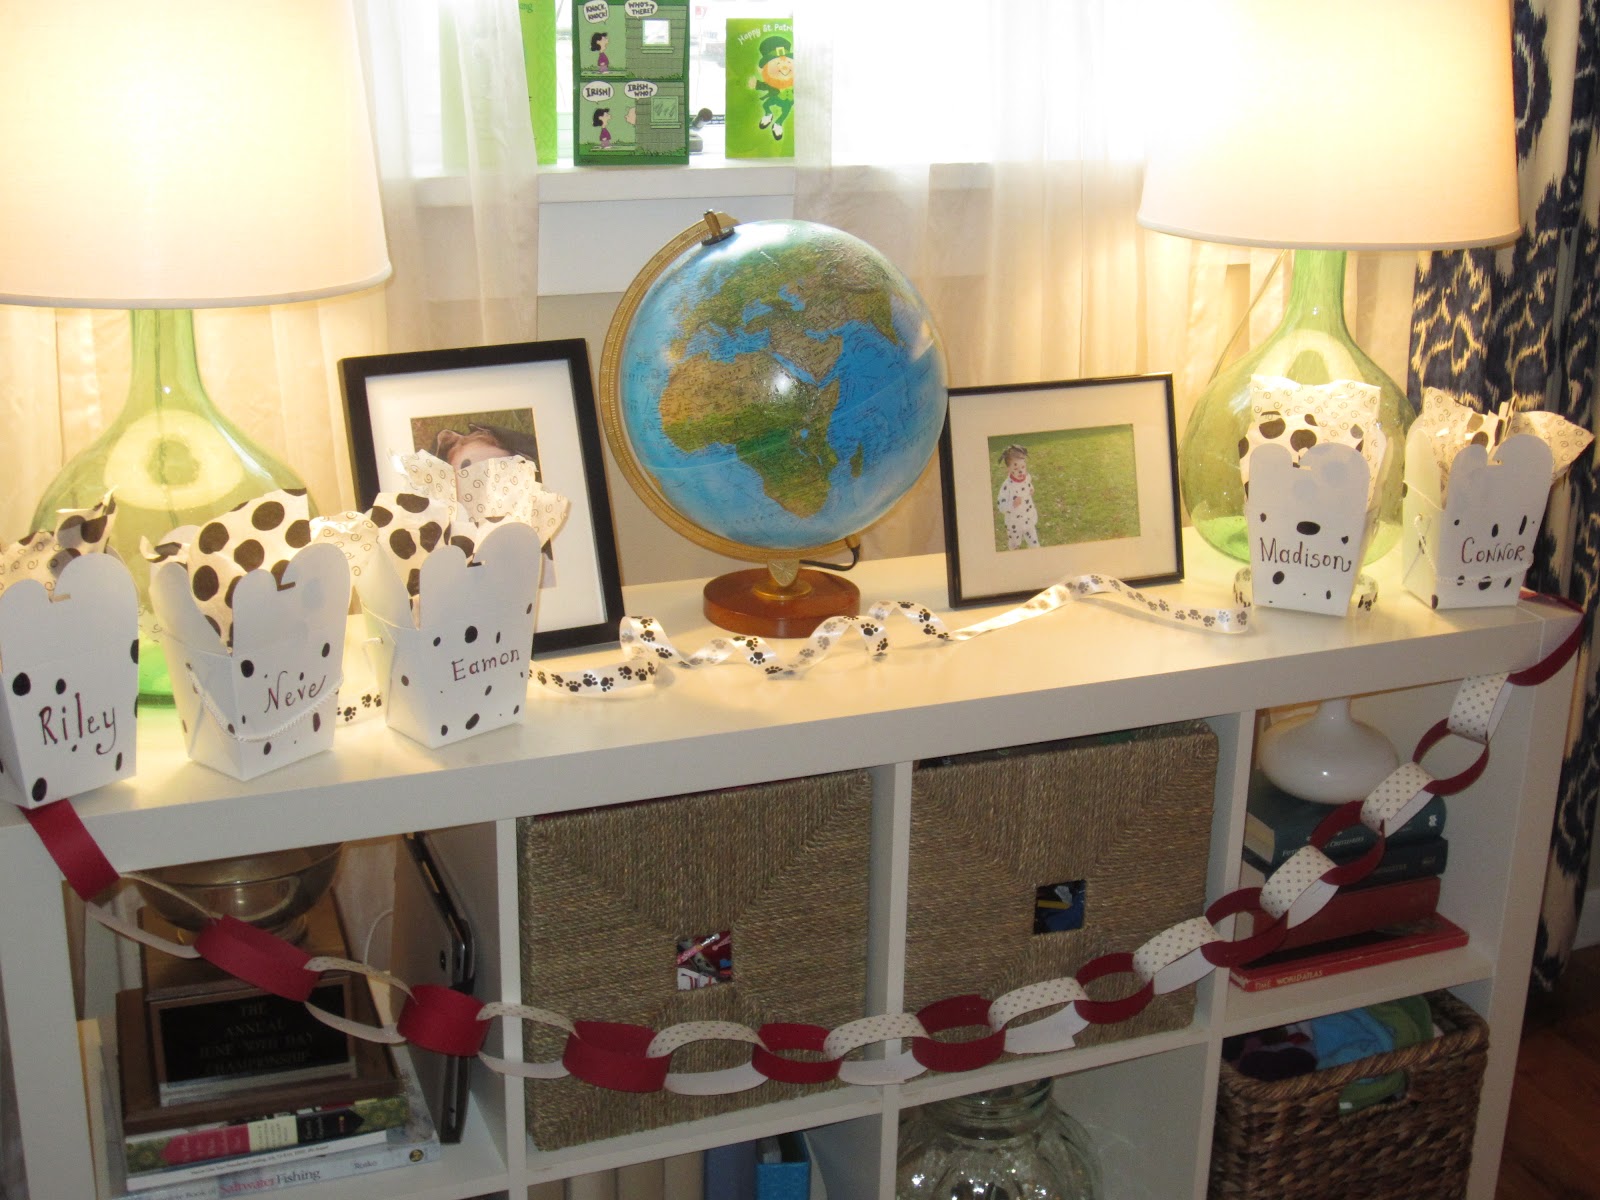
Some simple favor boxes for Eamon and his cousins to be filled with goodies from the pinata.
I made the paper chain out of scrapbook paper about an hour and a half before everyone arrived, because the console needed more red. There really is something wrong with me. It's like a nervous tic.


 A rather creepy looking, yet passable Patch cake. I used a Wilton pan that I already had and some pre-colored fondant that I picked up at Michael's. 


 The tablecloth is just from a roll of white butcher block paper, taped down with black and white packing tape that was in the clearance bin at Michael's.  The spots are from a roll of chalkboard sticker paper that I cut out with my Martha Stewart circle cutter.


 this year's scrapbook paper birthday banner

Eamon's birthday wreath. 
I made this for the first time last year.  It's just printed photos of Eamon on his birthday each year which I glued to more scrapbook paper and tied to a grapevine wreath I already had.  I love this little trip down memory lane each time I open the door.

I got all of the supplies for the party's decor at Michael's or our local 99 cents store. The pinata was the only thing I purchased from Party City.

Last year I was a bit of a nut with planning the details.  This year there was a lot less of that. 
What did I learn?
  • Lots of balloons go a long way: Eamon was thrilled at the sight of them.  
  • Kids don't care where their cake comes from, a box, the store or from scratch: if it's cake and it's for them, they are usually just fine.
  • A less is more approach makes it so much easier to enjoy the party: We always let the kids pick what food they want served at their party. Eamon picked pizza. I made a phone call and tossed a salad. Easy peasy. Once I let go of the notion of a more involved or refined menu, I realized how liberating it was!
  • Follow the kids' lead: We opened presents when Eamon wanted to, had spontaneous games of freeze dance and "hot dalmatian", and let the kids just play. Everyone had a blast  without me as a cruise director.
  • Most of the decorations end up in the trash at the end of the night:  It's a good perspective check. It can still be fun and tied together without breaking the bank or buying every character item in stock (I still have Thomas birthday plates from three years ago).  I have some leftover supplies from this party, but since they're generic craft supplies (i.e. scrapbook paper, balloons, tissue paper, etc.) I know they won't go to waste.
  • It's not about me: It can be really easy for me to get wrapped up and then overwhelmed by the details, which in the end, is more about my vision, than the kids'.  They will only be little once and right now, they are still incredibly easy to please and entertain. Soon enough they will want their parties out and they will have bigger guest lists.  This year, keeping it simple helped me to keep the focus on Eamon and what made him happy. 
Lesson learned. 
Although the idea of recreating  Melody's smoothie shop from the Freshbeat Band 
did float through my mind for Neve's birthday in May, 
I will try to remember that less is more.

How and what things do you try to keep simple?

Have a great day.


Erin 


Linking to:
Somewhat Simple
Lil\'Luna


11.02.2011

Memory Lane Trick or Treat Bags

I am always a sucker for celebrating photos of my kids. Last year I decided to showcase their photos on simple canvas tote bags I found at Michael's.  After sharing my photos of the kids with family and friends yesterday, I got a lot of requests for instructions on how to make the bags. It really is such an easy project and quick to update each year.

Materials:
  • cotton/canvas tote bag
  • puff paint
  • iron
  • dish towel or pillowcase
  • iron-on transfers (I used Jolee's Easy Image, purchased at Michael's)
  • scissors
  • your favorite Halloween photos of your kids

1. Pre-wash/dry your bag. Be sure to iron all the wrinkles out.
2. Set up a clean pillowcase or dishtowel on top of a hard, heat-resistant surface, not your ironing board.  I used a dishtowel on top of my stove. 
3. Iron the towel or pillowcase to create a wrinkle free surface.
4.Following the directions enclosed with the transfers, print your favorite picture on a transfer page. 


 5. Cut the transfer out in the size/shape you like.
 5.Remove the backing.


 6. Place the transfer on the bag, covered by the parchment paper that is included with the transfers.

7. Using firm pressure, hold the iron for about 10-20 seconds all over the picture until the entire image has adhered. Be sure to check that the entire image has transferred, especially the edges. 

8. Let your kids decorate the handles and edges with puff paint and voila, a trick-or-treat bag that has you strolling down Memory-Lane every year.

Please email me or leave a comment if you have any questions!
Erin
Linking this post to:

9.05.2011

Sunburst Pencil Wreath

In the spirit of Back-to-School, I've had this idea of making a wreath with pencils rolling around in my head for a while. In the spirit of procrastination, I finally got around to it today. It's 5:30 p.m. My oldest starts Kindergarten tomorrow and I'm still in my pajamas. I really had no image in mind or inspiration other than pencils, so winging it is probably an understatement. 

Here's what I came up with:

  • I wrapped a length of grosgrain ribbon leftover from Christmas around a small upholstery hoop I already had and then placed my pencils on the hoop, eraser ends touching, until I was pleased with the shape it was taking. 
  • Then I hot glued them in place, weaved more ribbon over and under every other pencil, trimmed and hot glued the ribbons' ends and attached a small loop of floral wire through the screw of the upholstery hoop. 
  • The whole thing took about an hour and only cost me about $4 in pencils. 
  • I might add another circle of chipboard for support behind the wreath, perhaps spray-painted with chalkboard paint. Usually that means it will never happen. Stay tuned.
Okay. With that off my plate, I'm ready for school to begin tomorrow ; )

Are you?

Erin

8.01.2011

Magnetic Paper Sorter...

Organization makes me happy. When things have a place and look neat and orderly, all feels right in my home. This feeling is usually fleeting. I so wish I was one of those people whose homes are expertly organized and systematized (is this even a word?), all the time, like these photos below.

   Organization 
images via Pinterest

Honestly. How does this happen?  I'm actually pretty good at creating systems and organizing things, it's the maintenance that is my weakness. Try as I might, things stray from time to time. I become forgetful or tired, seasonal decorations end up on the guest bed "just for now", and my family tends to think putting all the dinosaurs in their own bins or baskets is insane. A few months ago, in an effort to battle the counter top paper monster, I made this little paper sorter. 

I wanted something a bit more attractive than the plastic or metal options I found online and didn't want to spend a ton of money. I was inspired by this project over at Live.Love.Larson.
framed fabric from Live.Love.Larson.
I found the frame at my local Goodwill Store (with an old watercolor that had seen better days) and decided to put my own spin on Andrea's pretty project.

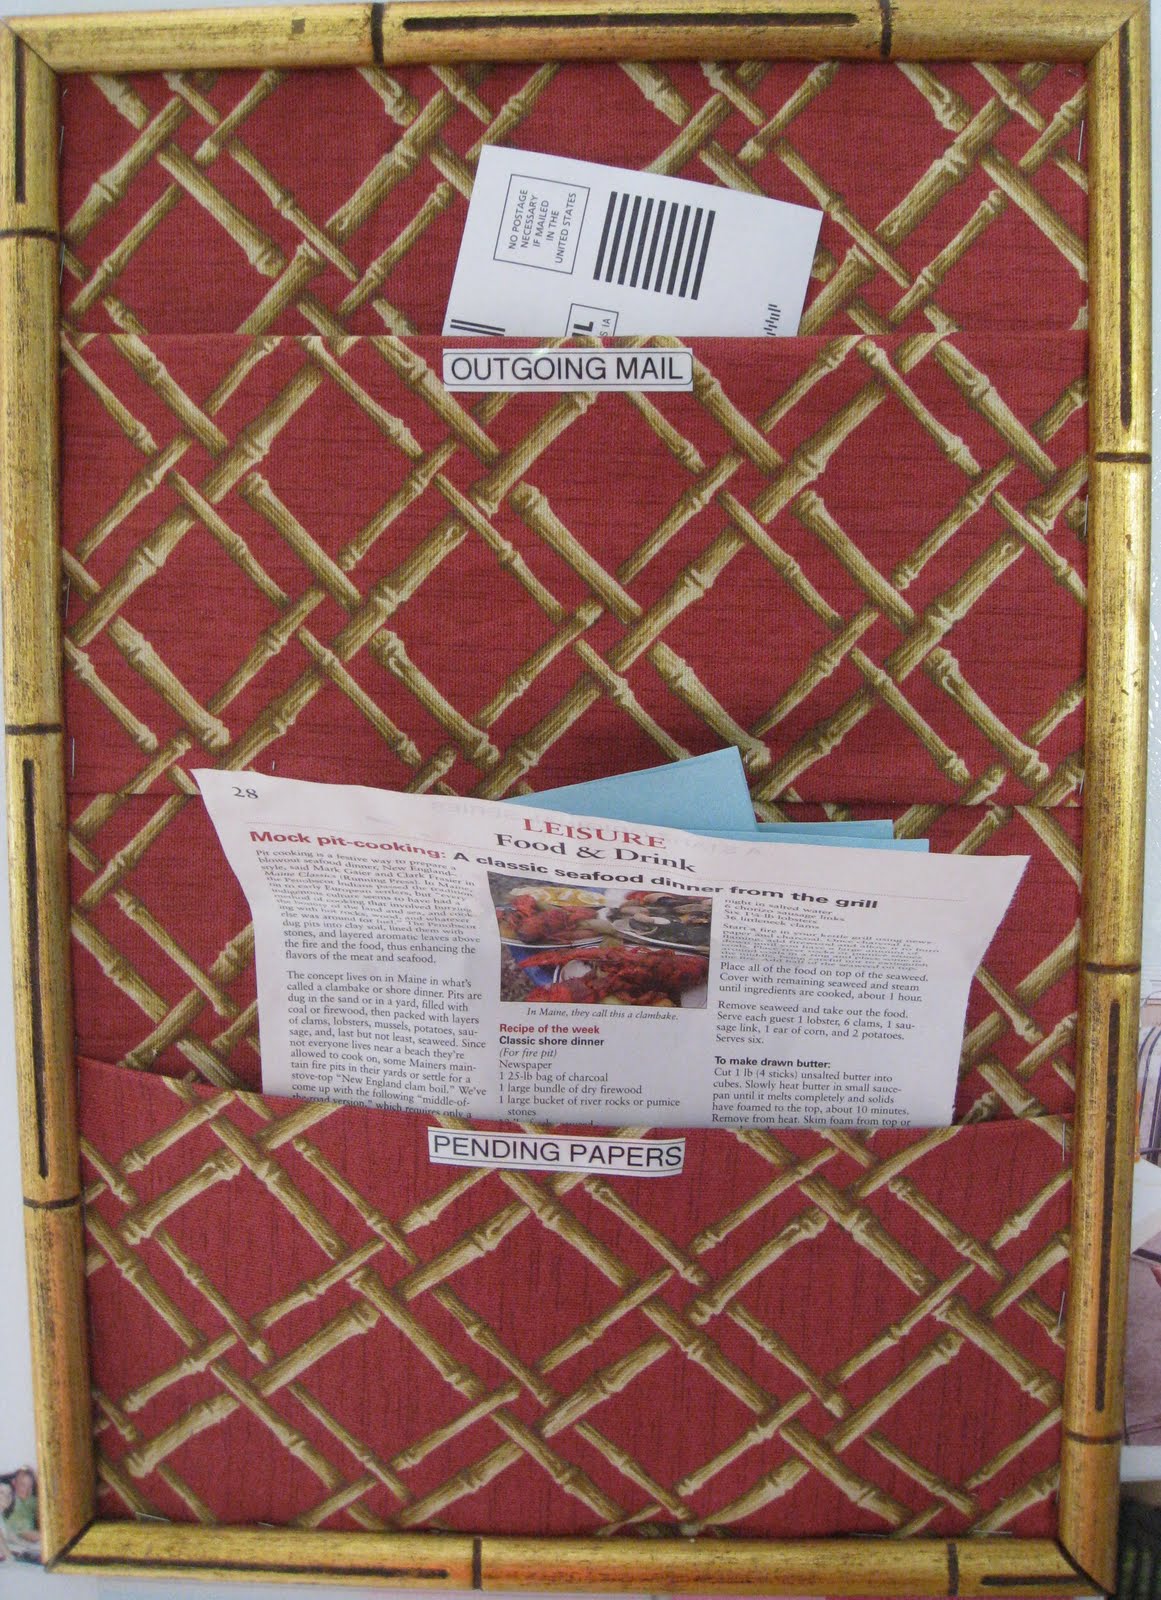
Using leftover fabric from my kitchen valances, I wrapped a piece of sturdy cardboard, cut  it to size, and stapled it down.  I secured it using the existing fasteners on the back of the frame. 

To create the pockets, I cut two strips of my fabric, taking the pattern's repeat into account. I ironed folded over the edges to create a hemmed or finished look. Then I simply pulled them taut and stapled them along three edges from the back side of the cardboard so the staples would not be visible (they blend into the pattern).  Fabric glue or hot glue would be more seamless, but I couldn't find my glue gun (ironically, it was somewhere on the guest bed).


Then I added heavy duty magnet tape to the back of the frame.
Using wood glue, I attached super magnets (these things having amazing magnetic pull) to the back, and put heavy canisters on top of them for about fifteen minutes.  Again, hot glue would probably work best. 
I printed out two labels for outgoing mail and pending mail/papers with my label maker and voila, a harried lady feels like she has some control (of which she really has none)!


So far, it hasn't become too overfilled, but time will tell. For now, it's the closest I'll get to effortless organization.  I may never be Martha organized. Honestly I may be too lazy for that. Right now I'd rather be at the beach with the kiddos while the summer lasts than a slave to correcting my less than stellar tendencies. I've got all winter for that...


Do you have an organizational project or strategy that helps you tame the clutter?

Erin